
Preserving memories on film requires skill, too
Trending
SOUTH WILLIAMSPORT -- You have spotted that whitetail deer you have been chasing for years. With the shot fired, you know it is good, the deer is down and now it is time to make that memory last forever.
Those who trek outdoors -- hunting, fishing, hiking, kayaking -- preserving your outdoor memories has the same importance to those who take that yearly family photo.
Professional photographer Eric Beiter said taking these kind of photos can be easy, even if you aren't a professional photographer.
Beiter, who owns Highland Photography Studio, offers some tips for those outdoorsy types on how to take that great photo, with very little effort.
Whether the whitetail of a lifetime, a young hunter has taken down his or her first rabbit or your crew has hit the gobblers, a photo is definitely on the agenda. Beiter said that golden shot can be taken with just about any camera you have.
First off, he says, watch your light: That big ball in the sky can hinder a photo pretty easily.
"A couple of things to think about; If you are going to shoot people, it is a pretty old rule -- and good one to follow -- keep the sun behind you," he said. "If you can, it will give you the best natural look."
The person holding the animal, whatever it may be, may have a hat on. Beiter said it is OK for them to leave it on -- but it should be positioned as not to obscure the face.
"They don't need to take it off. If they have the same problem I do, and don't have any hair, they can just push it up a little so it is higher on their forehead. It will allow light onto their face and eyes, and you will see that big grin," he said.
The angle matters, too.
"To really show scale don't be afraid to get down, bend on one knee, get down to the level of the person you are taking a picture of. Not quite to the eye level of the animal -- but the eye level of the person that was doing the hunting. This way you can really see the size and scale of the harvest. If you stand and look down on it, it will look like a parent looking at a child, and might make things look small," he said.
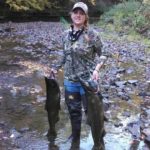
Those practicing catch and release on any body of water, may not be able to make it to the bank after every catch, try to make sure you have someone there to take that photo for you.
"Make sure you don't drop your camera either. I have done that before," he said.
He recommends if you are going out by yourself and want to document your catches, waterproof your camera and attach it to yourself.
"Go-Pro has chest cameras that are really useful and take some good photos," he said.
When taking a photo of a fish, keep it close to your body to help represent scale," he said.
As you eye up that photo through a viewfinder or screen of a phone, check what is around the person you are photographing. Look to the background, check the frame and your subject and make sure there isn't anything that looks like it may be growing out of their head or body.
"Pay some attention to what's behind them. Make sure trees or other objects aren't in strange places on your subjects," he said.
Remember to not have a lot of negative space above the person's head when taking the photo, he said.
"Looking at the screen or phone, whatever you are using to take the photo, tilt it downward so you get rid of the empty space above their heads," he said.
If they are 10 feet away and it looks like they are 30, get closer.
"Getting close enough to try to catch all the detail. So you are seeing the antlers, the points, the colors on the fish," he said.
Try a side-to-side shot verses the portrait, instead of holding the camera or phone up and down.
"Turn it sideways, even if you are taking a video, they translate better to either a TV or computer in that format," Beiter said.
As far as the landscape goes, watch that horizon line.
"One thing you see a lot of is the horizon line, avoid it being left in the middle of the photo," he said. "Think of a tic-tac-toe board on your camera screen, some have that in their settings, and bump that horizon line down to the top third of the frame."
This will allow a better overall image. He said you may have an interesting colored sky or flowers on the ground, move that horizon line around so it isn't in the middle of the photo.
"Again that sun being behind you is good, but not a steadfast rule. You can have the sun in front of you, but when your camera is in manual mode, it is not like your eyes. It doesn't see things the same, so you might get something lighter or darker," he said.
Using a flash isn't a must, but if you are using one, some cameras allow you to choose a few different types.
"At night you are going to need to look at options like a rear sync, fill flash and slow. If you can pick the flash, it will do the best job," he said.
The fill flash option will give everything the best light possible, spreading throughout the whole frame.
Rear sync is good if you have ambient light, he said. Like inside a building or garage, or if you are surrounded by other lighting from flood lights.
You do not need a big professional camera that costs thousands of dollars to take nice photographs.
Beiter said, "The best camera you have is the one that is with you.
"I carry a little Sony point and shoot with me in my 30-pound camera bag, with all my professional gear. I have it so I can just snap something quick or if I am out scouting for future shots and want to get it done easily," he said.
He said these can be perfect for hunters or anglers to carry.
When it comes to picking a camera, don't get hung up on megapixels. He said 20 megapixels is more then adequate for anyone.
"Most are between 15 and 24. No matter the brand they will all fall under that number," he said.
The zooms are another aspect to look for. Whether optical or digital, they do have a different way of functioning.
"Some are going to be a digital zoom of 200 and an optical zoom of 100. So what a digital ultimately does is degrade your image quality as you zoom in (closely)," he said.